
- Help Center
- LearningCurve
- Virtual Groups
-
WinjiGo
-
LearningCurve
-
TeacherKit
-
Student Information System
- Document Purpose
- Installation Files for 64-bit Operating System
- Installation Files for 32-bit Operating System
- Installation Procedure
- Installation on 32 bit Operating System
- Running the Application
- Student Enrollment
- Enrolling Students Using Emirates ID Cards
- Enrolling Students without Using Emirates ID Cards
- Staff Assignment
- Transfer Students among Homerooms
- Registration Period
-
Edison Robot
-
Akadimi Al Diwan
-
Ibtikar Maker
-
ibtikar Website
Create A New Group
For Admins and Instructors
To access Spaces
- Click
 from the system left navigation pane. The Spaces homepage opens.

Create Space
- From the Spaces homepage, click Add Space.

- Enter the space name, description and specialty.
- On the Add Space page, in the Space name and Description text boxes, enter the space name and description.

- In the Create space on you can choose which level you need to create your space On Organization Level or on a Segment level.
- In the Space Specialty list, click the specialty.
- Select the Allow trainees to find this space and join it the box to enable all employees to search for the created space and join it.
- Click Add Space; the space is created and ready for you to use it.

Note
You can edit or delete the space by clicking
 next to the space, in the Spaces homepage, then clicking Edit or Delete. This option is only available for the spaces you have created; you cannot edit or delete spaces created by others.
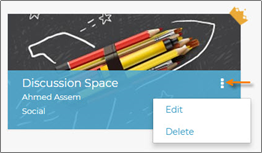
The Administrator is able to see all the spaces created within his organization and can deal with them with the same privileges as the space owner.