
For Admin Role
After creating the course with all its details, the Administrator can start managing it by clicking ![]() on top of the course page as shown in the figure below.
on top of the course page as shown in the figure below.
Editing Course
The Administrator is able to modify the information of the course already created by clicking ![]() on top of the course page, then clicking Edit. In case the course is linked to more than one term, make sure to select the term you want to edit. You can select the term from the Terms list on the top left of the course cover page. This list will only appear in case the course is linked to more than one term.
on top of the course page, then clicking Edit. In case the course is linked to more than one term, make sure to select the term you want to edit. You can select the term from the Terms list on the top left of the course cover page. This list will only appear in case the course is linked to more than one term.
Select Segment
The Administrator is able to assign segments to the courses already created by clicking on Select segment button

Map Competencies
The Administrator can map competencies that have already been created on the system before

Archive Courses
The Administrator can Archive the course by clicking ![]() on top of the course page, then clicking Archive course
on top of the course page, then clicking Archive course

Delete Course
- From the Manage Course menu, click Delete Course as in the figure below.

|
Note |
The course cannot be deleted in case there are trainees joining it. |
Create New Round
You can create a new round of the same course that contains all the created sessions, activities and added materials. This round can be assigned to a different instructor and joined by other employees in another time frame.
To create a new round
- From the Manage Course menu, click Create new round as in the figure below.

- In the Create New Round dialog box, from the Create new round from list, select the round which you want to copy its content to the new round.

- In the Round name box, type the round name.
- After entering the round name, you can add a translation to any of the offered language by clicking Add Translation as in the following figure.

- Enter the translation you want as in the figure below.

- From the All Segments list, select the segment from which you shall select the round’s Instructor.
- From the Select Round Instructor list, select the round instructor.
- From the Start Date and End Date fields, define the round’s star and end dates.
- Under the Round Settings section, define the maximum number of attendees, the round location, and whether the trainees need to enroll before the round start or any time before the round ends.
- Once done with providing the round details, click Save as Draft.
- Start adding the sessions, assessments, and content of the new round, then publish it.
Note
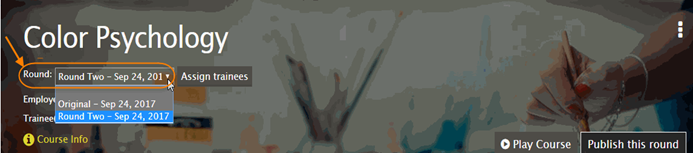
You can navigate between the different rounds of the same course using the Rounds menu on top of the course banner as in the following figure.
Manage Rounds
You can start managing the different rounds you created for your course.
To start managing rounds
- From the Manage Course menu, click Manage Rounds as in the figure below.

- In the Manage Rounds dialog box, make the necessary changes, and then click Update
Delete Round
To delete a Round
- From the Manage Course menu, click Delete Round as in the figure below.

|
Note |
You cannot delete a round having enrolled trainees. |